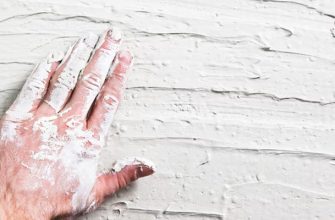
Spackle, not to be confused with drywall or joint compound, is a fixing solution that could be used to swiftly fix minor gaps and fractures in drywall. It is fantastic because it dries rapidly and shrinks a little, enabling you to repair small damages without having to wait 24 hours prior to actually repainting.
If you can figure out exactly how to spackle, every prospective wall fix will be super easy.
But, it not easy as it sounds, In this article we will share the answer to the most asked question, Should you sand before you spackle?
- So, should you sand before you spackle?
- What tools can be used to sand before you spackle?
- Sanding Sponges
- Screen sanding
- Sanding Blocks
- Sandpaper
- Best tip for sanding the walls:
- Can You Use a Random Orbital Sander to Sand Spackle?
- How to Sand a Spackled Wall?
- Step 1: Pick Your Spackle Compound
- Step 2: Clean the Patch Area
- Step 3: Apply spackle to the hole with a Putty Knife
- Step 4: Remove any Leftover Substances
- Step 5: Check your work (Applying another coat of spackle, if required)
- Step 6: Using fine-grit sandpaper, sand the repair and wipe away any dust with a cloth or sponge.
- Step 7: Paint the spackle to match the color of the wall
- Final Words:
So, should you sand before you spackle?
Yes definitely! After being sanded and painted, the spackle hardens firmly and blends in with the surrounding wall. When the spackle is dry, it generally seems tougher or a bit elevated in contrast to the rest of the wall. Sanding helps to smooth the surface and borders of the patch, making it blend in better. Even before a painting project can start, the spackled surface must be sanded.
So Basically, you should Sand before applying spackling paste and also after spackle has dried.
Pro Tip: Apply primer on spackle before painting otherwise spackle will absorb the paint making it look like a dull spot on wall.
What tools can be used to sand before you spackle?
Here are some of the most commonly used sanding tools:
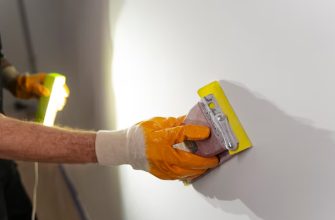
Sanding Sponges
Sanding sponges are made out of synthetic fabric with grit imprinted on the surface. It makes light sanding easy, specifically on drywall and drywall compounds like spackle. They can thus be found in the very same spackling and paint stores. The sponges come in a variety of sizes, with the majority of them fitting comfortably in the palm of your hand. Another beneficial aspect is that the sponge is shaped like a block, which keeps the sanding area’s surface flat.
Screen sanding
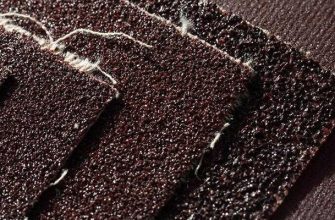
Sanding screens come in grits ranging from 80 to 220 and are commonly used to sand fresh drywall prior to painting it. It’s great for sanding, repairs, and spackling. It’s made to work with a drywall pole sander. A swivel-headed sanding block is a unique sort of sanding block. In the case of the sanded walls that have been mended, use a screen that is in the range of 100–150.
Sanding Blocks
Sanding blocks are available in a variety of sizes and forms. There are several that were originally tailored for drywall sanding. Workers use a precut strip of sandpaper or a sanding screen for this. You certainly do not want anything this large for basic spackling fixes. A quarter sheet of sandpaper will fit into a normal hand sanding block. They are adequate for sanding minor areas where modifications have been made.
Sandpaper
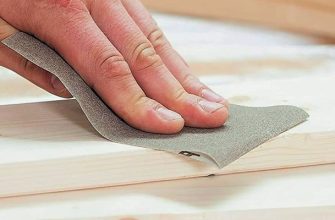
Lastly, spackling can be sanded with regular sandpaper. However, there are some precautions that must be taken into consideration. Grit is the first thing that must come to your mind.
If the grit is excessively rough, scratch marks will appear on the spackling area and the surrounding surfaces. Scratch marks in the paintwork can peek through it all and harm the look of your wall.
You would have to work incredibly hard to get a good surface finish if the sandpaper were way too fine. In practice, the spackling would not be smooth with respect to the surrounding surface. When sanding drywall or spackling areas, you should use a grit of 100 to 150. This grit range is relatively common, and you could already have plenty of matching sandpaper.
Another issue with sandpaper is surface grooving. When you use your fingers to push down on the sandpaper, you generate pressure points that cause the sandpaper to sand down more in these areas than in some others.
This can result in cracks or gaps in your wall’s surface. If you are planning to use sandpaper, a sanding block is an excellent option. The sandpaper will be kept flat against the ceiling or wall by the block or holder.
Best tip for sanding the walls:
- Due to the sheer low cost, simplicity, and ease of usage, you can best opt for using sanding sponges.
- These sponges fit comfortably in the palm of your hand and provide good tactile feedback when applying various degrees of pressure.
- Of course, you might use a sanding block instead of a sponge. It’s entirely up to you.
- Sand down most of the superfluous spackle with the medium grit side of the sanding sponge.
- Then smooth it down with the fine grit side of the sponge.
- Smooth it out with gradually lower pressure until no evidence of sanding remains.
Can You Use a Random Orbital Sander to Sand Spackle?
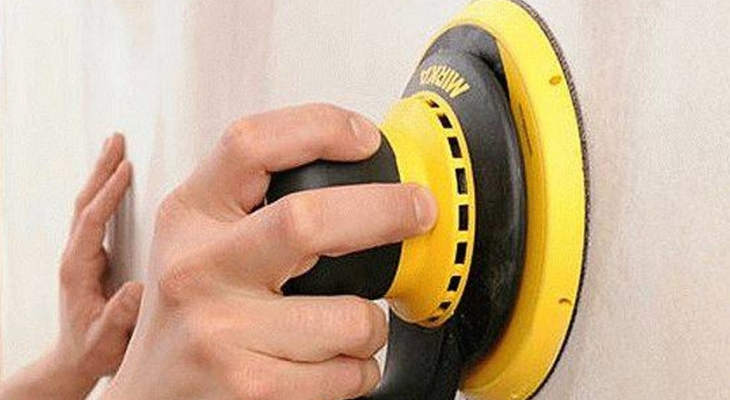
No. Using a power sander, such as the Electric or a random Orbital Sanders, to sand spackling is not really a wise decision as it will only cause a lot of trouble. The power sander can easily dig in too far and thus using it in this case isn’t going to help. It will certainly destroy the patchwork, necessitating more work.
A random orbital sander is a high-powered sanding machine and is made to manage large tasks. In such situations, it becomes extremely helpful to sand a vast area in a short period of time. Containers of joint compound and a significant amount of time, possibly 2 to 3 days, are required for tasks like these.
The spackling paste and putty, as well as the wall surface from around the repair, are both delicate components. Spackling compounds dry very quickly within a span of 1 to 2 hours and can only fill gaps up to 6×6 inches in size. To sand such a type of surface, you will need sandpaper and sanding sponges. Sanding a 6×6-inch area with sandpaper takes only a few minutes. An electrical sander could be used, but it’s not necessary.
You can also opt for a drywall hand sander such as sandpaper, sanding sponges, or sanding blocks.
How to Sand a Spackled Wall?
Repairing larger holes or gaps can necessitate two coats of spackle. Prior to actually putting on the next coat, sand the previous one. What you will require for this method is a sandpaper (120 grit or 150 grit) or sanding sponge (120 grit or 150 grit) and a cloth. Also include a drywall pole sander for greater reach and coverage if you need to spackle and sand a wide section of wall.
Step 1: Pick Your Spackle Compound
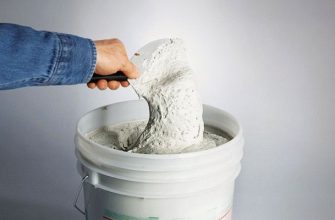
Choose spackle compound, which is available in two forms. One is that the powdered spackle must be blended with water to achieve the desired consistency. The other is the pre-mixed paste version, which comes in very handy. The pre-mixed compounds are available as “lightweight” and “all-purpose”. The lightweight one, which contains a vinyl binding agent, is appropriate for small gaps in regions that aren’t likely to be damaged in the future. The all-purpose one, which contains acrylic, is suitable for gaps up to 3/4 inch wide. Vinyl and acrylic both add flexibility to reduce shrinkage.
Step 2: Clean the Patch Area
- To improve the stickiness of the putty, arrange the area to be spackled.
- Clear every bit of dirt from within and around the area with a putty knife or fine-grit sandpaper, making the area as smooth as possible.
Step 3: Apply spackle to the hole with a Putty Knife
- Stir everything together.
- Spread it to the hole in the wall.
- The way you prepare the spackle depends totally on the sort of putty you purchase.
- If you bought powdered spackle, combine it with little amounts of water till you have a thick yet spreadable consistency.
- Make a modest batch. If necessary, you could still make more.
- Pre-mixed compounds are usually fine.
- Incase you are using only a recently opened bucket, mix it thoroughly.
- To prevent the paste from drying out, properly shut the cover after using it.
- Take out a little extra spackling compound with the tip of the putty-loaded knife.
- Keep the knife at an angle just above the damaged area and repair it using slightly slanted, downward strokes.
Step 4: Remove any Leftover Substances
- When the area is completely filled, wipe or remove any excess putty with a straight knife.
- Be careful never to force the putty out of the area.
- When you are spackling the wall, do not even worry about accuracy.
- You will sand it fine after it has dried.
- Clean any leftover compound from the wall near to the repair spot with a moist wet sponge or cloth.
Step 5: Check your work (Applying another coat of spackle, if required)
- Allow the compound to completely dry.
- Gently push the spackle with your fingertips to check if it is totally dry.
- Based on the kind and temperature, spackle can require anywhere from six to twenty-four hours to dry completely.
- You can know if it is dried once it feels firm and no fingerprints are visible.
- After around two hours inspect your work carefully.
- The paste reduced a little when it dried and so the area must appear to be recessed.
- The gaps deeper than 14 inches could, however, require more than a single application of paste.
- Repeat the previous steps, but this time leave a small mound to sand off afterwards and wait two more hours.
Step 6: Using fine-grit sandpaper, sand the repair and wipe away any dust with a cloth or sponge.
- After the spackle compound has dried, use 120-grit or 150-grit sandpaper or a sponge to gently smooth the patched area until it matches the adjacent wall.
- It is critical to put on safety gear to avoid inhaling the small spackle dust.
- With the sandpaper, polish the borders so they mix in with the surrounding wall and that there is no visible elevated surface.
- To polish the area, sand it in the middle using the sandpaper.
- Oversanding can eat away at the spackle and rip the drywall paper underneath.
- To eliminate sanding dust, rub the wall with a slightly wet cloth or sponge.
- Examine the region to make absolutely sure it’s smooth and free of high irregularities.
- Use the cloth to effectively remove unwanted dirt.
Step 7: Paint the spackle to match the color of the wall
Lastly, you have to carefully prime and paint the patched region till it totally fits in with the surrounding wall now that you have learned how and where to spackle and sand this hole and practically any other dents that may emerge. In a flash, you will have a smooth finish!
Final Words:
We hope this article was helpful in providing the relevant and additional information, Share it your friends as well to share the knowledge.

